
![]() Well , we’ve been working on our game for over two months, and after browsing through hundreds of webpages, I feel its finally time for me to share my experiences and knowledge with other indie game developers.
Well , we’ve been working on our game for over two months, and after browsing through hundreds of webpages, I feel its finally time for me to share my experiences and knowledge with other indie game developers.
In the series of articles I’ll be writing, I’m going to share everything that I have learned from my experience as an indie game developer. I’m going to cover everything an indie developer needs to know while working on a game.
It doesn’t matter if you’re an indie developer or someone as big as gameloft. There are three basic things you need to keep in mind while working on your game.
Marketing, Graphics, Programming.
Things like coming up with a Twitter account, a Facebook page, a website and reviews all fall under marketing.
Graphics covers things like the artwork you use, the game design, the logo, the icon, feature images, etc.
And programming, of course, covers all the coding behind the game.
I’m going to share my experiences in all these fields in my coming articles. And I’ll be giving you tips on how to move on from one phase in the development process to another.
So here are a few steps that will help you arrive at a concept for your next big game:
- Select your target audience
- Finalize a color scheme or theme for the game
- Get a concept screen shot ready
- Research
- Prototype
1) Select your target audience
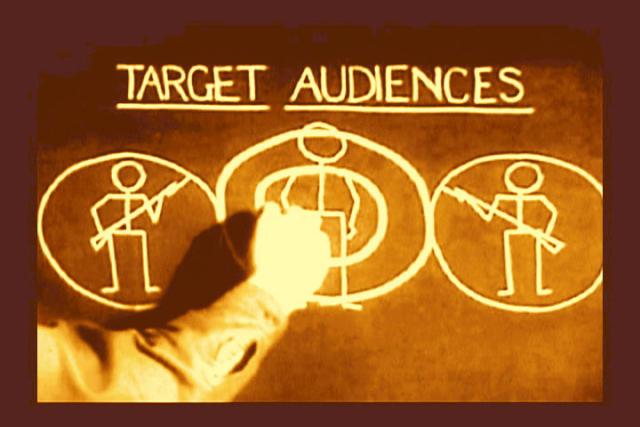 Now I know we all design games “for everyone,” or for “all age groups” and that’s great. But it is important for you to ask, ‘What is my target age group?’
This can be basically broken down to three categories:
- 8 to 12-year-olds
- 13 to 18-year-olds
- 18 and above
Now before you start designing for any of these age groups, it’s really important to understand each one of them. It is important to understand that each of these age groups turns to gaming with a different objective, and looks for different things in a game.
8 to 12-year-olds
Kids at this age are just getting introduced to gaming, and just starting to learn how it all works. Maybe they require the help of their parents to download a game from the store in the initial stages but they soon get the idea and are out there surfing the market. Kids in this age group are called “tweens” by marketers. Put more simply, most are teen wannabes. As many exasperated parents can tell you, tweens want to emulate the hot teen fashions, music, and language. Younger children are attracted by animation, cartoon figures, sounds and other special effects.
Use bright colors and eye catching graphics for this group. Children of this age group respond really well to bright colors and the game icon and screen shots play a really important role so use bright colors and eye-catching graphics for this group.
They may not necessarily read the game description or go through the permissions required. But once the game is downloaded, they are very quick to abandon it and move on to another game if it wasn’t what they ‘expected’ it to be. Of course, they do not take the time to even uninstall the game, and it’s up to their parents to go through the mess and uninstall unused games taking up precious space on the disc.
13- to 18-year-olds
Kids at this age range from somewhat grown up to almost grown up and they’re more sophisticated. They’ve moved on from the flashy graphics and effects they liked when they were younger. They still pay a lot of attention to detail, so having a good set of graphics is extremely important, but teens in this age group slowly start to appreciate more minimal forms of design as they grow up.
18 years old and older
This group consists of grown-ups who are much less likely to spend more than one or two hours of their day on your game. They usually get into gaming in between activities like traveling or in the middle of a boring meeting. So, they look for a game that is not time-consuming. That means if it takes one hour (literally) for a weapon to get delivered from the base to the troops, they are quickly going to move on to some other game!
2) Finalize a color scheme or theme for the game
Once you have a target age group in mind, finding the appropriate color scheme and having a mood board isn’t too difficult.
The following colors are associated with certain qualities or emotions:
Red – excitement, strength, sex, passion, speed, danger.
Blue – (listed as the most popular color) trust, reliability, belonging, coolness.
Yellow – warmth, sunshine, cheer, happiness
Orange – playfulness, warmth, vibrant
Green – nature, fresh, cool, growth, abundance
Purple – royal, spirituality, dignity
Pink – soft, sweet, nurture, security
White – pure, virginal, clean, youthful, mild.
Black – sophistication, elegant, seductive, mystery
Gold – prestige, expensive
Silver – prestige, cold, scientific
Try to implement the colors you choose in your graphics and posters as much as possible because your app icon needs to stand out from the rest for someone casually scrolling through the market to click it.
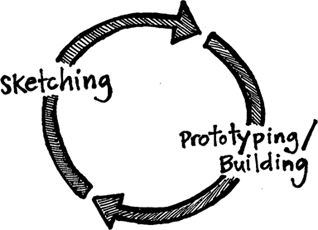
3) Get a concept screen shot ready
OK, so now you’ve decided on your target age group and have also figured out a color scheme for your game. Now let’s move on to the most important part: Getting a concept screen shot ready.
To do this, all you need to do is to open up a sketch book, and start sketching ideas.

It is not important for the very first idea to be the perfect one. But don’t stop scribbling no matter what happens because ideas will flow through your head as you sketch. A blank piece of paper will not limit your imagination. You can sketch anything, from the main character you would like to include in your game to a screen shot of how the game would look while playing.
I make sure that even when I am not coding, I always have a sketchbook with me to scribble down ideas that come to my head. You could probably get a great way of designing your home-screen while watching an episode of Masterchef. So, make sure that you have your sketchbook with you at all times.
Try to put down as much detail as possible, from menu buttons to the pause screen. The more detail you think in, the better. There are a lot of amazing games out there that would be on the top charts if they just had a set of better graphics and UI. So spend as much time as you can sketching. Try to fit it into your schedule. I spend around 2-3 hours on sketching, while coding for only 6-8 hours. It’s really important to fit sketching into your schedule.
I also prefer to keep a notebook with me while playing other people’s games. Not to copy but to analyse and note down my own original ideas. I got this idea of adding a hidden level while playing an old DOS game called DAVE that I loved to play when I was a kid. It could be that you had this great idea while doing something, and then because you forgot to make a note of it, it slipped past you, and then you recall it 2-3 months afterwards when implementing it into the game would be a huge pain.
4) Research
Your research should cover everything. Keep yourself updated about the latest devices out there. If  you’re developing for Android, then go online, and check out the latest devices in the market, and also a list of popular ones. Make sure to test your game with them in mind and make your game compatible for those devices. It’s really annoying to players when a game works fine on a mobile phone, but crashes on their tab or does not scale properly! Try looking through other open-sourced games for references at points where you do get stuck and look online for code snippets with common problems such as the “Rate me” pop-up or a Twitter follow button. These are basic things that take up a lot of time to code if done from scratch.
5) Prototype
Remember, all of this was to ‘prepare’ you to start developing your game. You have not started the game until there is something you have in your hand that you can actually PLAY!
Prototype first with whatever is available. As you prototype, your ideas improve and sometimes you stumble upon a better idea. Either way, I usually find it difficult to figure out what I want to commit to until I actually start making something. So make something!
 Now that everything is finalized, you should get a set of placeholder content ready first. And start with the basic framework of the game. Try to set up your basic classes, get the game loop running, start off with drawing a single sprite on the canvas and move forward from there. Make sure to implement all the classes step by step, and do not add everything at once, because at this point it would take up a lot of time to debug the code and figure out what went wrong in case the game crashes.
Also, you should make multiple copies of code. What I try to do is to make a copy of my project and start working on that every day when I turn on eclipse. This creates a kind of a checkpoint for me. That way if I’ve been coding for three days and I realize that my game crashes at the score of 3,000, I can just check it against the previous code and get things sorted out much more quickly. And there’s no harm doing so because projects do not take up much space.
In my next article, I will be going into a bit more in detail on the development process. After that, I’ll move on to some graphics stuff.
Let me know if you found these tips useful in the comments below.
Always remember:
“The way to get started is to quit talking and begin doing.” –Walt Disney
© 2013, The Indie Mine. All rights reserved.


Trackbacks/Pingbacks
[...] getting the concept ready for your game was just the beginning. Like I said in my previous article, you have not started a game till you have something that you can actually [...]